Showing posts with label dill. Show all posts

Thursday, May 26, 2011

Micro Ecosystem

I love my little yard. Watching the thriving ecosystems at work brings me daily joy. I hope the next residents of this little house will get as much out of the bugs and lizards as i do, and will in turn give back to the little creatures to keep them around.

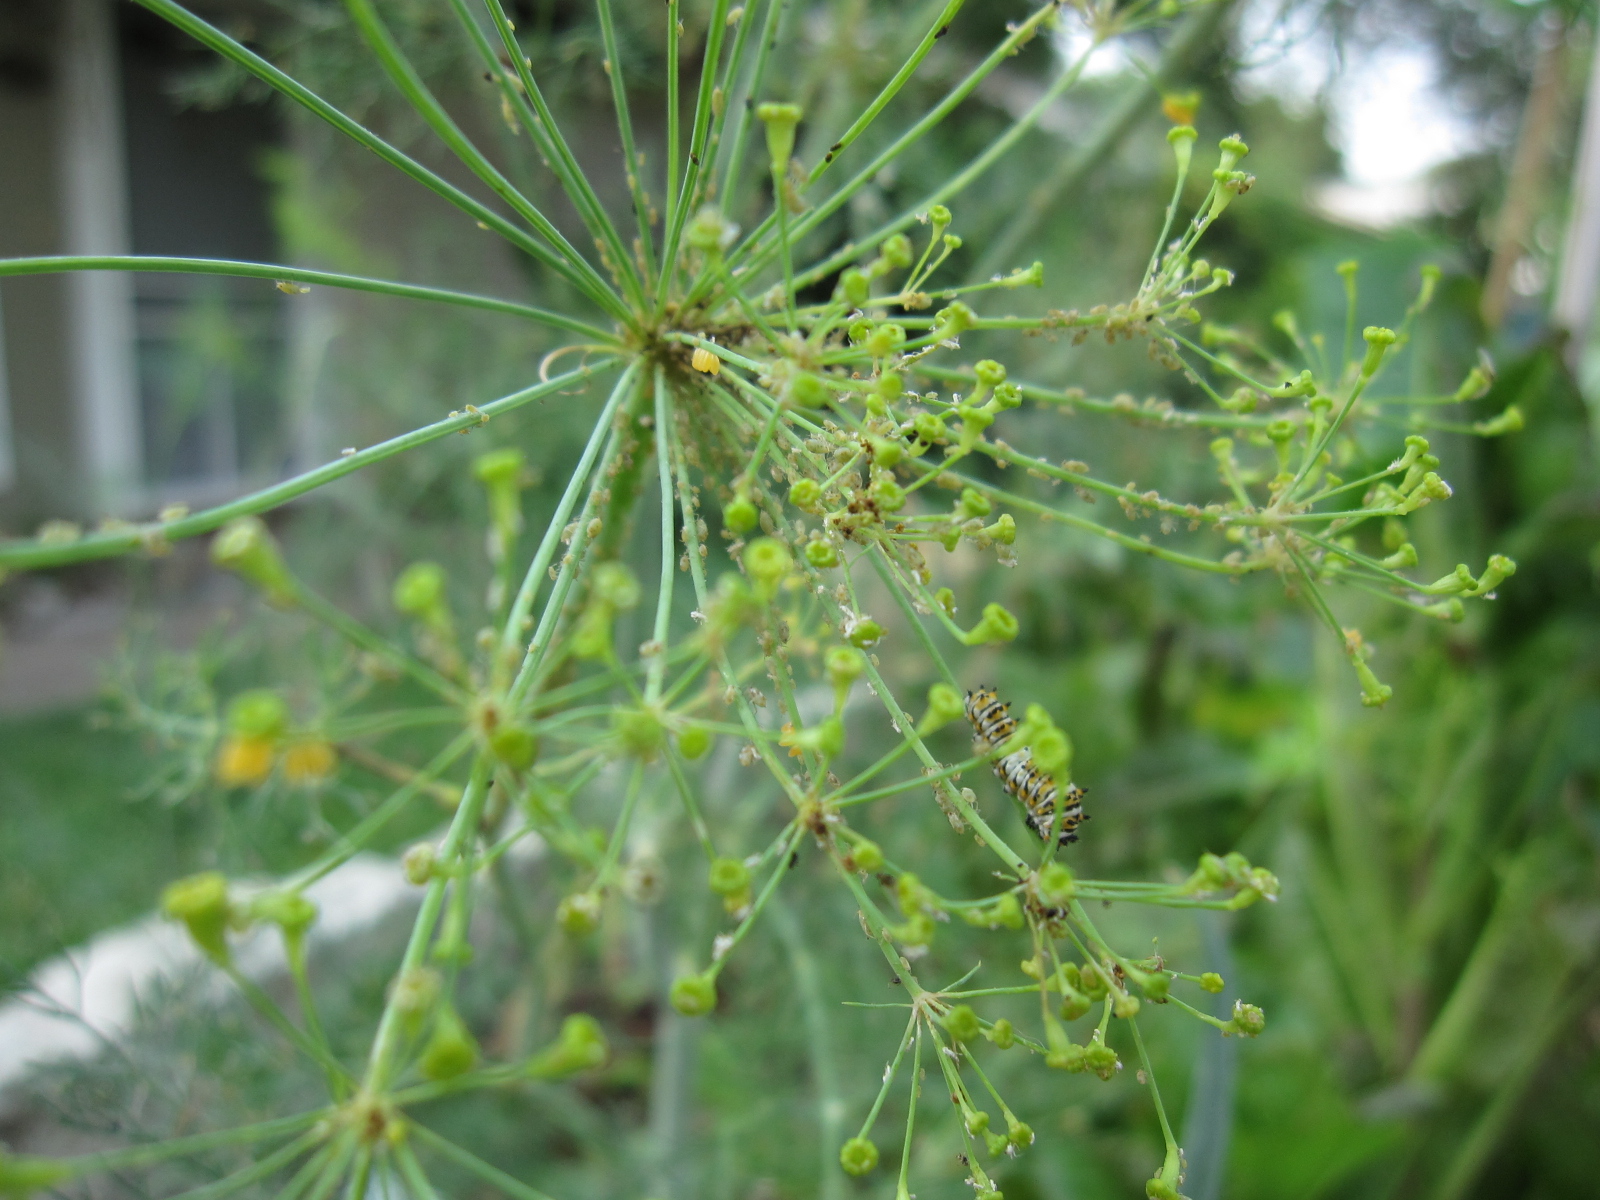
My early crop of dill was frozen this Spring, causing many swallowtail butterfly larva to starve or be easily picked off by birds. Pickings were slim. Thankfully, a new crop has come up tall and lush and the butterflies returned to lay another batch of eggs. On my way out to the car yesterday i took a few moments to pause and look at the tiny ecosystem flourishing in my front yard. It's amazing how much can be going on within the confines of one dill plant.

Top: Adult Ladybug (ladybeetle) Left: Ladybug eggs Right: Swallowtail butterfly caterpillar

The dill is coated with aphids. You might be tempted to squish or spray them, but i know there are ladybugs about that need feeding and that need a constant supply of aphids to keep them around. If i was to remove the aphids myself, the ladybugs would have to fly off to better feeding grounds. I want them around to protect my other plants, so i leave the aphids on the dill. I am rewarded:
Adult ladybugs, ladybug nymphs, mating ladybugs and ladybug eggs!


I also see some tiny swallowtail caterpillars in their 2nd or third instar. Still teeny tiny, but munching away. The dill won't last long once these guys get bigger. Thankfully there are more dill plants this season and they're flowering which gives even more protection from the mockingbirds.

Spiders can also be found in webs weaved amongst the flowers. Flies land on the flowers and get caught in the webs. Any help against flies is well appreciated by me!

It's amazing how transformed this once dead landscape is today. October 2007 saw a great change of hands of this little property. My hands may be leaving this homestead, but the ecosystem now thrives and should continue to do so as long as food, water, and natural gardening methods are provided. I'm looking forward to a little break from gardening while we transition to our new home, but i'm excited to get my hands dirty again in our forever homestead and make another ecosystem thrive around me.

Tuesday, May 25, 2010

Chrysalis I Have Known

I love watching the lifecycles of animals, especially bugs. This year is a particularly fruitful year for my swallowtail butterfly friends. My yards became certified wildlife habitats last year, and i think i'm seeing the many catterpillars of last year returning to mate and lay eggs on this year's dill. The dill is huge this year (taller than me!), which is good because there are millions of caterpillars counting on it for food. They need to hurry up and eat the rest though, as it's shading my spring crops just a bit too much and going to seed everywhere. I'm saving some to replant next year, and hope some of the dill is still flowering for pickles this spring. The rest will have to be pulled if the caterpillars don't munch it down soon enough.

Check it out - you can see where the prior instar of the caterpillar is left
as a husk behind the new instar (life cycle of caterpillar)

Then one by one they scamper off (very fun to see a caterpillar 'hauling *ss' along the ground away from the dill) to find someplace suitable to caccoon themselves. Here are a few of the chrysalises (chrsyali?) i have been lucky enough to find. I've since found a few more hidden on the parsley plants and on other things - be careful what you pull when you're thinning out your gardens, there may be friends living there!


Soon these will turn into beautiful butterflies. I can never catch them on camera, but i found an almost perfectly preserved, dead butterfly clinging to a rosemary branch the other day. She now adorns my studio wall.


These guys are all black swallowtail butterflies. I saw a pipevine swallowtail cruising along the sidewalk the other day, not sure where he came from as there aren't many of his host plants around my yards.

Do you plant host plants for butterflies? What kinds?

Wednesday, December 30, 2009

Herbed Oil and Vinegar

Ah, Christmas. Sometimes my favorite time of year. At the very least it's a great time to find excuses to craft, bake, and create things you might otherwise not find time to do. This post is tardy as i obviously didn't want to spoil any surprises!

Herbed oils and vinegars are easy to do, and especially special when they're made entirely with homegrown herbs and veggies.  This year I'm giving each set of parents (i have three) their own oil and vinegar sets. I have to ship the ones to my Dads and Moms in Oregon, so i am rigorously crossing my fingers that they don't explode on the way there.
Flavors and herb choices are entirely up to you or up to what your garden is providing. If it was summer i would have put in a lot more fresh basil, and if my lemon thyme plant hadn't died in this summer's drought i would have been able to put a lot more of that in there: same goes for my lemongrass. You simply want to choose "a theme" and try to stick to it. I put together what i had on hand:

Herbed Oil - Italian Herbs with Garlic

  • Extra Virgin Olive Oil
  • fresh and roasted garlic - mashed + whole for garnish
  • fresh rosemary and sage - diced + whole sprigs for garnish
  • fresh oregano - diced
  • peppercorns and dried hot peppers for garnish
Flavored oils are so easy: Simply dice up all the herbs and garlic and put in a mortar and pestle with a drizzle of oil. Mash until you can't stand it then scoop it all into a mixing bowl. Pour the rest of your oil into the bowl and mix well - be sure to get all the goodness off the pestle.  Once well mixed pour the oil mixture into some well sealed jars and be sure to shake them up daily. Marinate the mixture for at least 2 weeks. (i had to skimp the Rommels due to time i'm afraid, theirs only got marinated for about a week, sorry!) When you are ready to bottle simply stuff the fresh herbs and peppercorns/garlic into some pretty bottles: feel free to recycle old oil bottles for this. Using a strainer and funnel one over the other carefully pour the oil into your bottles. The strainer will catch the gook and the funnel will direct the oil into the bottle instead of all over your counter. Be sure to leave some room on the top.
Try and store the oil in a dark, coolish place. The fresh herbs contribute to ease of going rancid so you want to use this oil within 6 months and keep it from getting too warm and friendly to bacteria.

Herbed Vinegar with Citrus

  • White Wine Vinegar
  • Fresh Meyer Lemon Zest for marinating and garnish
  • Garlic - diced + whole for garnish
  • Fresh Dill - diced + whole sprig for garnish
  • Fresh Parsley - diced + whole for garnish
  • Garlic Chives - diced
  • Lemon Thyme - diced
  • Peppercorns and Dried Hot Pepper for garnish
  • (wanted to include fresh lemongrass, but it died in the first frost)
Pour vinegar into a non reactive pot and heat to just boiling. Meanwhile dice all the herbs and mash in a mortar and pestle. Place herbs in a mixing bowl and pour hot vinegar over them when it is ready. Cover and let cool. Once cooled off a bit pour the vinegar mixture into well sealable jars and store in a dark place, shaking daily, for at least 2 weeks.  When you're ready repeat the same process as with the oils and pour through a sieve and funnel into pretty bottles - i reused the original vinegar bottles.

Presentation:

Is totally up to you, of course. But i wanted these to look pretty and special and "me." I scraped off the original labels with a flat exacto blade, any sticky residue can be removed with WD40. If i had had labels, i may have stuck something to the side of the bottles, but since i didn't i used black hemp twine and recycled Artagain Paper (the same that i use with my illustrations). I hand wrote (redoing several times as my handwriting is NOT good) the ingredients and suggested uses and storage instructions on the paper and strung it to the bottles with the twine. I think the black hemp looks nice on the naked bottles filled with pretty and scrumptios stuff.

Thursday, December 24, 2009

Deviled Eggs with Smoked Salmon

A. Fresh eggs are REALLY hard to peel. Despite using a tip from a fellow poultry enthusiast: put 1/2 Tsp of baking soda per each quart of water, the shells still stuck like crazy. A few of the older eggs peeled a little better. (fresh eggs are harder to peel due to a lack of air or something like that, less space between the membranes)
B. I love deviled eggs, despite them maybe not loving me so much. The husband loves them even more, so what better light dinner before Christmas feast? We picked up some smoked salmon at Whole Foods the other day after ice skating and i was inspired.

To boil the eggs:
Place eggs in pan and cover with 1 inch of water, along with 1 tsp of baking soda if using fresh eggs. Bring to a boil on med/high heat. Once boiling, cover and remove from heat, set a timer for 15 minutes. After the 15 minutes have elapsed, pour out the hot water and put the eggs in a bowl of ice water then the fridge until ready to use.

Deviled Eggs:
Most ingredients are to taste, you just need a creamy consistancy, this is about what i used:

6 boiled eggs, halved with yolks removed
2 spoonfuls of mayo, i used Light
about a tablespoon + of dijon or spicy mustard
a good squirt of regular yellow mustard
a pinch of fresh dill
dashes of paprika for garnish
finely chopped smoked salmon and green onions, about 1 slice of salmon
could also add some chilly powder, but i didn't this time
salt and pepper


Mush the yolks with the seasonings and mayo/mustard until rather creamy/sticky. Add the onions and salmon. Taste and adjust to your liking. Carefully spoon the filling into the halved egg whites (you can tell mine are a bit unsightly, but we're eating them ourselves so who cares) and garnish with some green pepper, a little more salmon and paprika.


Ta Da.