Friday, July 30, 2010

Roasted Summer Veg

This was too delicious, and too easy not to pass along. I served the veg over some pasta with a little extra olive oil and salt drizzled on the spaghetti. I added a fried egg for protein and flavor (love my backyard hens!) and served along with a cucumber salad. Warm and earthy, cool and crisp - a great combo indeed.

For the cucumber salad:
  • Several diced cucumbers
  • Splash white vinegar
  • Handful fresh lemon basil leaves, chopped
  • Salt, pepper, chilly powder
  • Pinch sunflower seeds (without shells)
  • Optional cream cheese or sour cream
Just chop, mix, chill.

For the roasted veg. Seriously, this is so easy and delicious PLEASE make it at least once this summer!

  • Several small asian type eggplants, halved and diced in 1/4 inch wedges
  • As many tomatoes as you have on hand - i used some had already been roasted for an hour, and some others fresh. 
  • 2 serranos diced
  • 3 cloves garlic sliced
  • Salt, pepper, genovese basil
  • Olive oil
Cut the veg, drizzle with olive oil and seasonings - toss to mix and spread out on a pan. I used our toaster oven to save on heat. The amount of veg that just covered the pan inside the toaster oven made just the right amount for the two of us. Roast the veg at 425 for about half an hour, or until things are sizzly to your satisfaction. Stir occasionally, and be sure the eggplants don't burn.

The flavor! Oh, the flavor! Buttery garlic bites, earthy eggplant bites, rich tomato bites, and nutty olive oil flavor infused throughout.  You could puree this into a sauce if you wanted, but i like having individual bites. This could be used as bruschetta topping, mixed with cooked quinoa to make a slammin main course pilafy dish, top pasta as i did or even use as a pizza topping. Options are endless, and the effort is minimal - just some chopping and waiting for the oven. Ideal, i tell you - ideal!


Summer is a season we wait for all Winter. Wait for the eggplants, tomatoes, and whatever else we look forward to growing. We also tend to look forward to specific dishes we like to make and have made plenty of times before - but don't let the 'same old' dish you're used to making limit you. Experiment, try new methods, increase your nutrient consumption variety, open your tastebuds to new things, don't get stuck in a rut! Enjoy the variety of summer's bounty and combine it in some new ways this year. It may be hot outside, but i'm sure glad i turned on the oven to make this deliciousness!

Thursday, July 29, 2010

Soup Recipe, with a kick!

I looooove tortilla soup. Though, actually i've never actually HAD tortilla soup - i just make up soup recipes that i refer to as being tortilla soup. There are never tortillas involved.


Usually i throw together some hominy, Rotel, chicken or turkey meat (or no meat) and some stock and spices to make a yummy, brothy, spicy soup refreshing on hot or cold days. This evening i created a soup full of ingredients from the garden and homemade turkey stock. I formed ground turkey into balls for a little textural excitement, and served with a dollop of sour cream. This made the perfect amount for two hungry humans - could be spread out to 3 or even 4 servings as a side dish.

Zesty Summer Soup with Turkey Meatballs
  • 1/2 pint condensed turkey stock
  • 2 or so pints water
  • Several small red onions (garden fresh onions really make me cry!)
  • 2 cloves diced garlic
  • 2 serrano peppers, red ripe and diced
  • 3 kaffir lime leaves roughly torn
  • Double handful Porter Improved (could use roma) tomatoes, quartered
  • Salt, pepper, cumin, hot smoked paprika - season to taste
  • Ground turkey
    • 1 package ground turkey
    • Splash Worchestershire sauce
    • 1-2 T taco seasoning (i use Colorado Spice Company, no msg)
    • Salt, pepper, cumin, chilly powder
  • Handful of whole wheat orzo pasta

Place  all veggies and liquid into a medium pot and bring to a boil - simmer, covered until broth takes on some kaffir taste, about 15-20 minutes. Add meatballs and cook until they all float and are cooked through, about 10 minutes. Add orzo 10 minutes before serving. Be sure and dip that ladle all the way to the bottom to get even dispersal of goodies.

You could add many other veggie options, and sub the ground turkey for shredded rotisserie type chicken leftovers or even beef or pork meatballs. I just love making soup - it's really so much easier than you would think, and just about anything is possible. I really see no reason to buy canned or cartoned soups from the store - make your own! It'll taste even better!

Wednesday, July 28, 2010

Wholesome Wednesdays: Lemon Balm (Melissa officinalis)

I planted some medicinal style herbs this spring, and am very happy with my lemon balm. I hadn't really used it much until i made some sun tea - i think i'm sold! Combined with the Stevia plant i also planted this spring - i got naturally sweetened, lemony tea. Great on a hot afternoon, of which we have plenty.


Lemon balm is a member of the mint family (as is basil, i believe - those two being the only members i can stomach, can't stand the taste and smell of most mints) and grows in a lovely mounding shape. It's beautiful and lush, and smells amazing - plant along a walkway to enjoy the delightful aroma released when brushed against. It grows low to the ground, mounding up to about 2-3 feet at tops, much like most oreganos. Lemon balm won't spread by seed as much as some mints - but it divides wonderfully and can be propagated with cuttings.  Bees will love this plant when it flowers little white flowers. Lemon balm prefers mostly sun and slightly moist soil, but will grow in dry soils - as mine is doing presently.

Lemon balm has many uses and benefits. Check out this lovely page for some excellent information. Here is an excerpt:
In the Middles Ages lemon balm was used to soothe tension, to dress wounds, and as a cure for toothache, skin eruptions, mad dog bites, crooked necks, and sickness during pregnancy. It was even said to prevent baldness. As a medicinal plant, lemon balm has traditionally been employed against bronchial inflammation, earache, fever, flatulence, headaches, high blood pressure, influenza, mood disorders, palpitations, toothache and vomiting. A tea made from Lemon balm leaves is said to soothe menstrual cramps and helps relieve PMS. - herbwisdom.com
 This table is an excellent resource (also taken from herbwisdom.com):

 This herb is excellent for promoting mental clarity and for relaxing the muscles and gastrointestinal system. Feeling down in the dumps? The fresh citrus scent is delighting to the senses, and the oils found in lemon balm may be relaxing to the muscles and calm stomach upset.

Lemon balm is a versatile herb and can be used in cooking, medicine and cosmetics. An excellent pairing with fish, vegetables or poultry - lemon balm is wonderful chopped fresh or mixed into a white wine sauce in replacement of lemon fruit. Around the house lemon balm is great as a laundry rinse, yummy smelling potpourri mixes or mixed into a furniture polish by infusing in linseed oil and turpentine. Infuse the leaves for a mild tisane/tea for an upset stomach, or apply leaves directly to insect stings to relieve the pain.

For my lemon balm tea i simply plucked a handfull of lemon balm leaves and a short stem with leaves of stevia plant. I set these along with a bag of green tea in the sun covered in saran wrap (in a pitcher of water of course) out in the sun for several hours. I lifted out the leaves with my hands and squeezed the last of their goodness out before discarding them to the compost. This tea is naturally sweetened by the stevia and has a bright, lemony flavor - not tart like lemonade, but quite lovely and refreshing. I might feel less depressed, and my headache is gone - so who knows - the herbal benefits may be kicking in already!


Do you grow a favorite herb to make teas with?

Tuesday, July 27, 2010

What To Do With a Texas Hill Country Surplus?

Thanks to my in laws for a wonderful weekend of river-play, and a bushel of fresh peaches and peppers from their gardens. I have plenty of hot peppers for our consumption growing in my own gardens, but as you can tell by reading most of my recipes - i like a little fire in every bite! I happily accepted Pops' pepper surplus and plan on storing about half and experimenting with the rest.


Storing peppers is quite easy and can be done in a variety of ways:
  • Blend up into a hot sauce that will keep over a year (vinegar based)
  • Pickle
  • Dry (cayennes and other thin walled peppers are best for this, but jalapenos can be dried/smoked and stored in adobo sauce for chipotle peppers)
  • Freeze
Freezing is my most frequently used method of storing hot peppers. You don't need to blanch them or even cut them up as they cut easily and cleanly while still frozen. I just cut their tops off and pop them into a sealed freezer bag. I only recently finished last year's habanero harvest - so convenient to have them on hand, ready to dice and pop into any recipe. They won't thaw as a nice crisp, firm pepper suitable for a stuffed popper, but frozen peppers are perfectly wonderful for cooking with.  I usually go out and pick peppers only when they're destined for supper - but my serranos are popping and ripening like crazy, so many have headed to the freezer or into hot sauces (olive oil emulsions). The jalapenos are outdoing themselves as well - i think black bean-cheese stuffed/ turkey bacon wrapped poppers are in our near future!

I really enjoyed the sour pickles i fermented a few weeks ago, and enjoy pickled jalapenos on nachos and salads - so, why not try my hand at those? The bag of peppers i was given is a mixed lot - mostly serranos and jalapenos, with some other peppers that look to me to be anaheim type peppers. I'll save the serranos for hot sauce and salsa, and pick out the larger peppers to be pickled. I saved some of the unused brine from the cucumber pickles, so i can make a smaller batch of these pepper pickles. ( so many Ps! )

Simply chop the jalapenos, toss in a mason jar along with some garlic cloves and a little onion bulb or two, cover with the brine and hold down with another jar and lid to keep the peppers covered in liquid. Set at room temperature for 5-7 days depending on the temp of the house (covered with cloth to keep the flies out) and wait for the peppers to change color and taste the way you want them. Store covered in some brine in a smaller jar in the fridge. Should keep for a good long time.
I separated into two jars as i wanted to leave plenty of head space for any fermenting bubble action.

Note: Leave MORE HEADSPACE THAN THIS - in only a few hours both jars began to overflow with the brine. Fill the jars about half way up with brine, and maybe place jars on something absorbent.

And what about those peaches, you ask? I may make a crisp, and will definitely make some peach salsa to accompany some locally caught trout a good friend gifted us - recipes later in the week. Or perhaps we'll just slice them and enjoy them fresh and raw along with our evening glasses of wine (and maybe some vanilla ice cream?????).

Monday, July 26, 2010

The Results are IN!

As promised, i chose a winner for my multiplying onions. They're sitting in my fridge (though many are still int he ground if the winner prefers super fresh onions) and should still be totally viable for snacking and / or planting. The onions i planted in the back are perky and growing like crazy.


And the winner IS:
Lucky number seven


I would have tried to be more creative and chosen the winner via chicken sh*t bingo style, but i just can't beat Susy from over at Chiot's Run and her dog-slobber method. Please shoot me an email, Teri with your address and i'll try and get your bundle of onions to you as soon as i can find a box they'll fit in. Don't be surprised if by 'box' i mean assembled scraps of cardboard held together by packing tape and prayers. Congratulations!

Time for the Fall Garden!

Ha, i think my mom will think THIS post is insane, as it only just warmed up at her home in southern Oregon - and is still dropping in the 40s at night. Oh how i wish for cool nights - but then i wouldn't have eggplants! The weather is really heating up here in Austin. My thai pepper is finally blooming. All the hot peppers are being pretty productive. The pests are out in force, and the cukes are much smaller and less productive. I have to water pretty often, but have lots of cover crop (purple hulled peas) stuffed in between my veggies, so the roots are pretty well shaded and most the plants are still happy despite the heat. It may be hot now, but Autumn is just around the corner - and that means putting in the fall garden. Instead of planting new tomatoes, my plants are healthy enough this year to be cut back and encouraged to produce for a second time. I cut back my heirloom plant a week or so ago (after the birds stole almost all the beautiful fruits) and it's currently showing little shoots here and there of new growth. Today i hacked my Porter Improved by about 50%. It is in a very sunny part of the yard, so i didn't want to cut it back the full 75% so that the roots remained somewhat shaded. That Porter is just covered in Leaf Footed bugs, but they're drowsy in the morning and easy to plop into a cup of water or cut in half with my pruning shears, mwa ha ha ha.

Before - big and bushy
After - thinned out significantly. 
Green tomatoes harvested and placed in a paper bag in the window with an apple to ripen.

Pests and diseases are often a big problem in the heat of the Summer. The plants are already stressed, so it's a great time to pounce for a garden predator. Give your veggie plants some TLC with seaweed/fish emulsion sprays and a little extra fertilizer and compost. You can dilute compost tea and foliar feed (water the leaves and blooms) - and remember to only foliar feed early in the morning or late at night as the heat of the sun combined with the goodies in the liquid fertilizer can burn the plants' leaves.

Porter Improved tomatoes, little Matt's Wild tomatoes, and some ripe serranos

Squash vine borers devastated all my winter squash - i ended up with two tiny butternuts. So sad. So i pulled out what was left of them to go into the compost and will replace them with new hot pepper transplants. Again i will attempt to plant a cayenne - can i escape the curse!? I sure hope so, as my cupboards are bare of homegrown/ dried peppers. I happily have plenty of ripening jalapenos, serranos, whatever the not-cayennes are, and a few habaneros (more on the way, i hope). I use these fresh in salads and stir fries, and also freeze many for storage: you don't have to blanch or cook hot peppers before freezing - just pop them right into a freezer bag. They won't be crispy when you thaw them out, but they'll taste the same and be perfectly fine for cooking with (and easy to cut when still frozen).

Serrano, Mucho Nacho Jalapeno, Habanero, 'not cayenne' mystery pepper hiding at the right.
harvest of cucumbers, purple hulled peas, red ripe serranos, and tomatoes

Are you planting a Fall garden this year? Here in Texas it's often our best season. Those plants that have made it through the brutal Summer will bounce back with joy for a respit from the heat and produce like crazy. I hope i have a good season. I didn't plant any bell peppers, and do miss them from last year - especially the Giant Marconi and Golden Bells. Maybe i'll stick on in along with the cayennes in my main bed. There's a bit of room since i along with the failed squash i've also pulled out the Mexican Sour Gerkins i planted and hated. They did nothing but vine and look pretty. The tiny fruits they produced were too insignificant to warrant keeping them around. 
The Natural Gardener has some helpful info on what to plant when - here's what they say about July here in the Austin area. Texas A & M also have a really helpful planting schedule that is usually right on mark.

Good luck bearing the heat, sun, and mosquitos that Summer brings, and happy gardening!

Friday, July 23, 2010

Building a Compost Bin


As you all know, i have a beautiful compost heap in the backyard. It has two sides, a 'working' side and a 'idle' side: right now the left is where we add all our trimmings and kitchen waste, and the right side just hangs out getting turned occasionally waiting to become finished compost. My compost heap is so pretty that my dear friend Mary asked me if i'd help her put together her own composting project. We wanted to use supplies she had on hand, plus any extras needed to help tie together said scrap supplies. Mary has two rambunctious dogs and no chickens, so we wanted to build something rather sturdy and 'keep the critters out' friendly. There are a million ways to compost -from state of the art designer bins you can buy, to a mushy pile hiding in your back yard. An ideal system would be to have two or three bins or bin compartments - add waste to all three bins, at some point discontinuing new additions to one bin. Continue to add scraps to bins 2 and 3 and allow bin one to 'finish' composting - you should get compost in about 6 months without a lot of turning. Composting is a personal experience, and should work around your lifestyle. You can turn it every day, you can ignore it for months at a time. However you compost, the organic matter will do the work for you - it just might take longer if you give it less love.
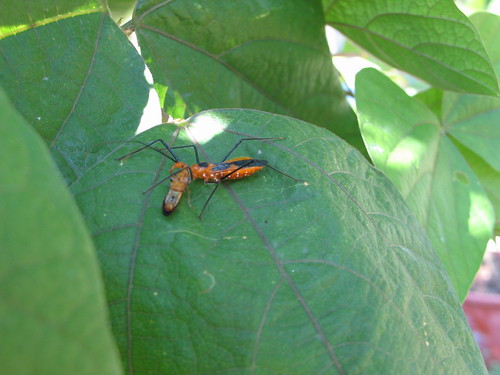
I'm very sad to say that my compost heap is habitat to many lovely and magical geckos - which is great, but what's not great is that BB my Chanteclar hen is a ruthless hunter. Just today she nabbed a very large gecko and dispatched it despite my efforts to distract her. I really hate the negative impact the hens have on some of natives. I will definitely be restricting their access to my future homestead so that plenty of habitat remains for the locals. I always catch and release the lizards that get in the house out to the front yard where there are fewer feathery arsenals.

I've mentioned once before this amazing book on composting that should have a place on any gardener's bookshelf. It really takes the mystery out of the scientific/organic process of decomposition and gives plenty of details to help you make the most of your compost heap. From ratios to generalizations, this book has it all. But when it comes down to it - "whatever was once alive" has a place in the compost heap. I'm talking hair, feathers, food scraps, moldy bread, cardboard, paper, toilet paper rolls, abandoned leftovers, yard trimmings, weeds, leaves, plant cuttings, and ruminate (horse, goat, pig) poop or human pee (yes, the urea is a great compost activator). No dog/cat poo please or rancid meat or dairy. Just about everything else is fair game. To get really happy compost you have to have some manure. My chickens provide almost enough, but i still like to supplement my pile with some horse manure or whatever poo i can get my hands (gloved) on. I like to let my chickens into the pile when i first add in scraps. I used to feed them the scraps directly, but with the puppy in the backyard i prefer to keep their treats out of her reach. They aerate the heap with their scratching, eat up any goodies including bugs that in turn improves their egg production and general well being, and provide fresh poo to the heap all the while.

Back to Mary's compost - here's what we had on hand:
  • Wire from my yard
  • Yellawood lumber with pointed ends perfect for driving into the ground
  • Wierd masonite plywood stuff
  • Smaller holed wire
  • Shovel, mallet, nails

The structural integrity is held up by four posts at the corners. Removable/exchangeable boards are placed on the interior of the posts to keep the moisture and warmth of the bin in. When these get too cmposted Mary can switch them out for some cardboard or whatever she has on hand. The heap is held together with some wire that will allow air flow and moisture in. It would be nice to divide this bin into two sections so that she can have one pile 'finishing' and another to put scraps in - but she can also just concentrate her addition of new scraps to one area and dig out any finished compost she needs from the bottom. The doggies should be pretty well deterred by the height and stabbiness of the wire - but Mary will need to get a large piece of cardboard like i use, or an old quilt or carpet scrap to cover the heap with. Uncovered the pile will dry out too quickly and be more attractive to pooch investigation.

The scene is set
Not a bad hour and a half's work! We got good and sweaty and filled with pride. We didn't purchase a single supply: all were on hand in her backyard or mine. That's the way to build a compost heap! Compost is the ultimate "get the most out of what you have" turning common waste into the best fertilizer/ soil treatment a gardener could ask for. Compost is nature's way of dealing with plant waste and enriching the soil. Compost loads the earth with nutrients and improves soil texture and water retention. Compost tea (diluted compost stepped in spring water) can be used as a foliar feed, soil feed, and pest/disease deterrent.

Here in Austin there's a lovely program to help folks delve into the magical world of composting. I'm not much on fancy compost bins, though i do miss my worm bin. But for some folks they're a real convenience, so check out that program if you're local. Basically you just take a free composting class and they help you buy a compost bin with a city rebate. I prefer the way Mary and I did it, but taking advantage of city rebates is always good.


So, if you've been making excuses about how hard a composter would be to build, expensive to buy, or inconvenient to use: GET OVER IT! Go out there and start composting, even if it's just a pile of leaves (which is how MY compost heap started out). Your garden will thank you and your waste will be reduced. Every trash can should be equipped with a hand slapper that chastises humans for putting compostable items into the bin. Composting is where it's at and there is NO excuse not to be doing it!!!

**Update for a PS: Check out this great post about compost at Not Dabbling In Normal. I want that book!

Thursday, July 22, 2010

New Feature

Just a short post to announce my new "Recipes" page. Navigation is found at the top left corner of the main page, just above all that Foodbuzz sillyness. I'll do my best to update that page whenever i add a new recipe so that all my foodie goodness can be found in one place.


Pocket says "Let's hear it for convenience!"

Homemade Dog Biscuits - Simple Living Thursday

***** Please note the updates on Dog Nutrition in this POST. Whole wheat may not be the best flour to be using when feeding our pups - many are allergic to it. Please avoid using Wheat, Corn, Soy, Sugar, Dyes, and Non-organic Eggs *****

We love our puppy and we want to feed her as wholesomely as we feed ourselves. I've been baking up this recipe for my dogs since i was in the 6th grade back in Merrill, OR. One of the teachers at my elementary school would fly up to Alaska (or Canada or wherever it takes place) to race in the Iditarod each year, and she gave us all this recipe during some pep assembly. I tweaked it up a bit to suit my puppy's needs, and if she could speak i think she'd recommend them to her friends. You can roll them out thin or thick - thinner makes them easier to break apart for training, thicker makes them harder to chew - so depending on if you're using them as training tidbits or pre lunch snacks, roll accordingly.
These treats are edible for humans too, depending what you add to them. I used to snack on them when i was a kid ;)


Ingredients
  • 3/4 Cup hot water or Meat Juice*
  • 1/3 Cup Spectrum natural vegetable shortening or other natural shortening or butter (i used less to make these lower cal, and subbed in a little peanut butter for flavor)
  • 1/2 C powdered milk, i used goat
  • 1/2 tsp salt *optional
  • 1 egg beaten
  • 3 cups whole wheat flour
    • I subbed in a little bit of diatomaceous earth with the flour to help combat worms. Brewer's yeast would also be good to add - repels fleas and is good for the skin.
* For the meat juice i purchased some inexpensive soup stock beef bones and boiled them for many hours along with some beef liver. After the beef liver was boiled i cut it into tiny bits and sundried them in my car. That was not a pleasant car to get into the next morning, but Pocket approves of the treats. I have about a quart of meat juice leftover to use for more batches of dog treats.
More options are to add vegetables to the broth to increase the nutrients in the snacks. Try leafy greens, apples, squash, cucumbers, carrots, broccoli. 

  1. Pour hot liquid over margarine and peanut butter
  2. Stir in milk, salt, egg
  3. Add flour 1/2 cup at a time, mixing well. This will be a very stiff dough.
  4. Knead 3-4 minutes adding more flour if necessary.
  5. Roll to 1/2 inch thick (see notes above)
  6. Grease a baking sheet and place cookies with a bit of space between themselves. You can use cute cookie cutters, you can cut into pea sized squares or rectangles. I made rectangles that i break apart for training - i will try cutting them into tiny sizes before baking next time and see how that goes.
  7. Bake for 15 minutes at 325
  8. Allow to cool, remove from pan and store in a sealed jar. Makes 1 1/2 pound and seems to keep quite well.
Positive reinforcement training really works, as our little pup is proving daily. For heaven's sake don't use newspaper if your puppy has a potty accident (which was your fault, by the way!), give her treats every time she pees outside where you want her to, and use healthy treats as lures during difficult training excercises. Dog training is less about making your dog learn to be a human, and more about understanding and listening to your dog, talking to her, encouraging her when she is good (all times that she's not being bad) and ignoring when she IS naughty. It isn't difficult, but it does require consistency and patience.

 Practicing "Down" and "Leave it"

I feel good knowing where my pup's treats come from, and what's in them. I feed my chickens locally made organic non-gmo feed and organic veggie scraps from the garden. My turtle gets mystery pellets along with her bananas and grubs, but she's not overly picky. 

Two long dogs, laying down together. "Sleep" seems to be her most frequently practiced skill.

Do you eat organic food, slow food, local food? Do you feed your pets according to the same dietary goals and limitations as yourself?

I think that "stick" may be slightly too large to fetch, Pocket.

PS - Don't forget about my ONION GIVEAWAY! You still have until Monday to enter your comment for a chance to win a bunch of old fashioned multiplying onions! You get double the chance to win if you 'grab my badge' (in the right hand column) and post a link to your blog with said badge attached. Networking is fun!

Wednesday, July 21, 2010

Wholesome Wednesdays: Eggplant (Asian)

I finally harvested my first two little eggplants this weekend for our pizza. My poor little spontaneous purchase Thai Heirloom Eggplant has not been doing very well. All spring/early summer it has been attacked and ravaged by flea beetles, lacebugs, and any number of other nasties including aphids. With the warmer/longer days it has finally perked up some. It's putting on some fruit, and trying to cope with the barrage of evil bugs and lack of rain (would it kill me to WATER my plants???). Last year's favorite eggplant were the Green Goddesses: small, light green eggplants with very tender flesh, light and tasty flavor, and no skin bitterness. I can't stand Italian eggplants with their thick, bitter skin and spongy flesh - but i love Asian eggplants! They're usually slender and have much milder flavor. These Thai eggplants were even better than the GGs, now if only they'd put out some production!


Eggplants are a member of the nightshade family, along with peppers and tomatoes so don't plant them in the same place as those plants in consecutive seasons. They dislike crowding, and love the heat. Eggplants may aggravate arthritis - so if you suffer from that ailment it would be worth skinning the fruit to help remove the more bothersome parts. Eggplant greens are somewhat toxic, so don't nibble on the plant itself.
Eggplant is a very good source of dietary fiber, potassium,manganese, copper and thiamin (vitamin B1). It is also a good source of vitamin B6, folate, magnesium and niacin. Eggplant also contains phytonutrients such as nasunin and chlorogenic acid.
They are an excellent food to aid in weight loss, being low in calories and fat. Eggplant is a nutrient dense food, which will help you feel full, and there are almost no calories in eggplants.

eggplant calories: there are 20 calories in a cup of eggplant, essentially zero calories for purposes of your diet.    -PeerTrainer.com
 Feeling in the mood for ethnic dippable food? Switch out hummus for some baba ganoush for some very filling, very flavorful snackage with minimal calories. It's a pretty easy recipe, and as variable as your preference. I simply roast or grill some asian eggplants whole or halved longways. Drizzle with some olive oil and seasonings if you wish. Once grilled, chop it all up and combine with some garlic, and any spices you feel like, including lemon juice, tahini, sesame or olive oil, mint or basil. Blend it all up and wamo - delicious hummus-like dip with a scant amount of the calories.

Tuesday, July 20, 2010

Misunderstood Beneficial Insects

Awesome discovery!
Big assassin bug munching on a nasty leaf hopper in some bean plants.
 
Gardeners who value natural balance know that beneficial insects can be our greatest allies. Being an organic gardener means that not only are you feeding your family chemical free food, you're feeding the soil healthy nutrients, and you're providing a habitat for bugs of all kinds, including the nasty ones. By keeping pesticides out of your garden, no bees will be damaged when pollinating your flowers. By allowing some aphids to remain on the leaves, you're feeding generations of ladybugs and keeping them interested in staying so that they're there as your best defense against the next inevitable swarm of aphids and other pests. Anoles and geckos will fill your gardens if they have plenty of bugs to snack on, and they too will help rid your garden of the numbers of pests that can damage your crops. But along with the good bugs come the bad, and it's your responsibility as a gardener and good Earth citizen to know the difference between the two and allow the beneficials to thrive and protect your spread from the nasties.

acrobatics
Nasty hornworm caterpillars can defoliate a tomato plant quite rapidly

One misunderstood beneficial insect is the wasp. I am personally allergic to wasp stings, so forgive me if my photos are a bit out of focus due to a bit of distance between me and my friendly neighborhood nesting wasp. We all know that bees are the big pollinators, and have been in trouble lately due to the use of pesticides and the introduction of alien bees. But along with bees come their flying cousins, the wasps. They can sting repeatedly, and are excellent predators not just of your ankles, but of some very nasty garden pests.

Paper wasps prey on insects such as caterpillars, flies and beetle larvae which they feed to larvae. They actively forage during the day and all colony members rest on the nest at night. - Texas A&M
I have seen it in my very own garden: a big ole' hornworm, all deflated and dead and eaten from, hanging by its weird little filament off a tomato branch it was in the process of defoliating. This particular wasp nesting in a little pipe coming out of my house is a paper wasp. The adults feed off nectar, pollinating as they go, but they feed their larval young bits and pieces of common garden pests, thus ridding my tomato and pepper plants from unwanted foes. I caught these pictures a day after i'd have liked - on the day prior i saw inside the paper nests little wriggling larva babies! It was pretty cool, to say the least. On this day mama wasp has covered the tips of the nest to keep her babies protected. Once she's incubated and hatched these baby wasps, they will leave the nest and never return - paper wasps only use their nests once.

So, please think twice before zapping the wasps with some nasty canned wasp killing spray. If you stay away from them, they'll most likely keep their stingers to themselves, and give you a big helping hand in the garden.

Monday, July 19, 2010

Pizza From Scratch

Thank you, Heather for sending me this recipe from the Bread Bible! This crust was easy, fit into my day's schedule, and DELICIOUS!!!!!!!!!! I'm serious. I wanted to save leftovers. This was not possible due to the level of delicious. Had to be eaten. All of it. Right away.

Anyhoo, i got up around 9 (yay for weekends with puppies who sleep through the night with no accidents!) and put together this dough (into which i added about 20% whole wheat flour and some dried herbs), leaving it out for half an hour, then popping it into the fridge. About an hour before cooking time i took it out of the fridge and stuck it on a pan that i should have greased more as i had a hard time dislodging the pizza for serving later. Every single ingredient i used was from my garden or a friend's who i made mozzarella with that morning. Not my best batch of mozz, but we were highly distracted by puppy playtime and neighborhood gossip.
For this batch of pizza i used the following toppings:

  • Roasted garlic cloves
  • Roasted thai eggplants with olive oil, smoked paprika and salt
  • Multiplying onions
  • Fresh diced tomatoes
  • Fresh diced bell pepper
  • Fresh diced red ripe serrano pepper
  • Salt and pepper
  • Pesto sauce
    • Bunch genovese basil, few leaves lemon basil, pinch walnuts, pinch romano cheese, salt, generous drizzle garlic infused olive oil

I remembered that my stick blender had this handy dandy food processor attachment - worked great for this small batch of pesto without having to dig out the big food processor. I baked the crust for 5 minutes, popped a huge air bubble, slathered with pesto, topped with toppings, baked another 5 minutes and voila! Deliciosa! Paired with the very odd but cool film "Something Wicked This Way Comes" we had a most excellent Sunday night.  Once i have a more active life filled with fence building and other laborious chores we'll have to make this a Sunday tradition! For now, my mostly sedentary self will only indulge in this recipe on special occasions. I hope to increase my 'bread' repertoire more, and this was a good start to help me build my self confidence.

The bottom got nice and crispy but not burnt, the dough complimented the toppings perfectly, a little bit of spinkled cheese and salt tied it all together: groans of satisfaction filled the room.

Do you have a favorite pizza crust recipe?